
Animation: Part
1
One of the key elements in making
your animations look good are the settings. So let’s get that set up
and then we can start creating !!!
Open PSP – choose a pre-made tag you
have and open it in PSP. Duplicate it and close the original. We
are doing this just to have something to work with. Copy.
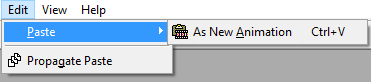
Open Animation Shop (which will be
referred to as A/S from now on). EDIT – PASTE AS A NEW ANIMATION.
EDIT – OPTIMIZATION WIZARD
The following images will show you
the settings that I use:
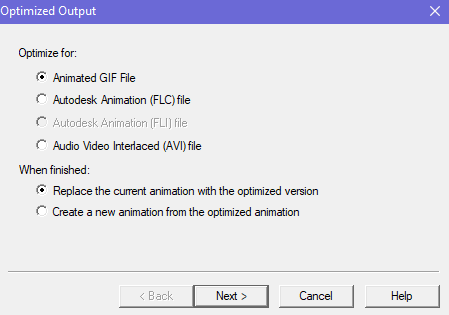
Click NEXT
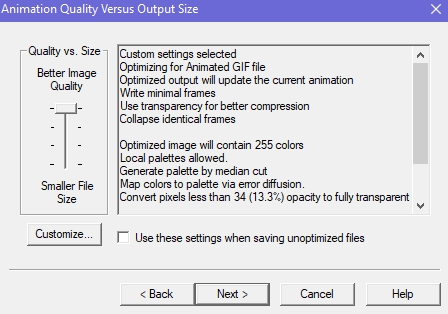
Uncheck the box (use these settings
etc.) then click the CUSTOMIZE button
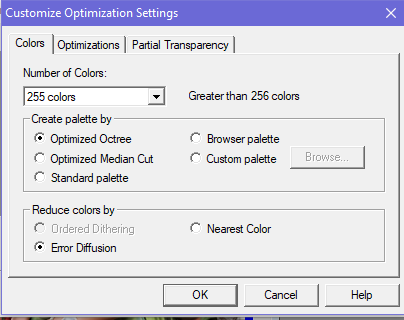
At the top – select the Optimizations
tab:

At the top select the Partial
Transparency tab:
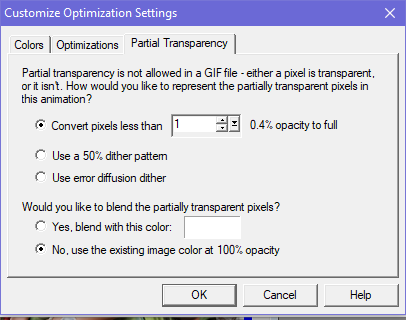
NOTE: The convert pixels
amount may need to be adjusted depending on your preferences – I have seen
various people change this number from 1 to 43 – as I said this is what works
best for me – you will have to determine what works best for
you. This number allows me to have a clear animation and not one
with a white background.
Now click OK
You are back to the first window –
click the box (use these
settings etc)
NOTE: For
some reason from time to time the CONVERT PIXELS setting changes all by
itself. Therefore if you notice that your animations are becoming ‘hazy’
or ‘pixelated’ – I suggest checking your settings first and make sure they are
as they should be.
NOW LET’S MAKE AN ANIMATION:
These steps will all be in PSP:
Open a tag you’ve already made or
create something new – if you open an existing tag – make sure you duplicate it
and close the original so you do not lose the integrity of your tag.
NOTE: Make sure you have you do any resizing before
you start animating. If you fail to do
this – your image can become distorted.
Now let’s add some noise.
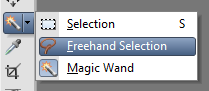
Activate your magic wand and select
freehand selection
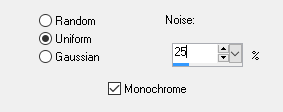
These are the settings I am using –
but you can adjust this per your preferences

I chose the waterfall as my area to
animate

TIP: If you
are animating more than one area – make sure to hold down the SHIFT key while
drawing around it – so that everything stays activated.
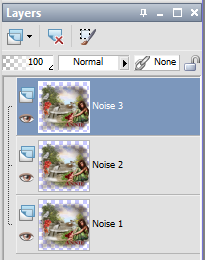
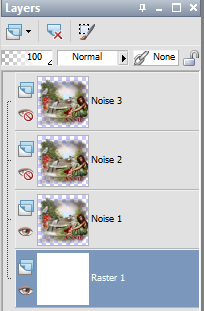
Now we need to decide how many frames
we want – seems a rule of thumb is 3 when doing this type of
animation. On your layers palette – duplicate your image 2 times for
a total of 3 and rename them as I have done.
As you get more comfortable with
doing this – you may not need to rename them – although it is a good practice
to get into.
Apply the noise setting you like best
– this is what I used
Now X-out Noise 1 and open and activate
Noise 2 – change your noise percentage – usually increments of 5 work
best. So I changed mine to 30.
X-out Noise 2 and open and activate
Noise 3 – change your noise percentage – I used 35.
Go to Selections – Select none.
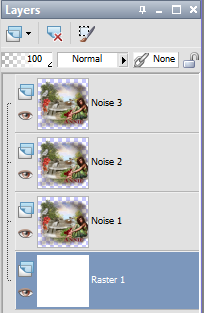
Because this has a mask layer – I
need to add a white background – add a new layer – fill with white – send to
bottom
TIME TO ANIMATE:
In PSP, X-Out the top 2 layers and
activate Raster 1 (your white background layer). I always keep my background layer
activated. This way I just close or open
the other layers and when I edit merge – I never have to worry that I have the
wrong noise layer selected.
Edit – COPY MERGED. In A/S
– Edit – Paste as a New Animation
Back in PSP – X-out Noise 1 – and
open and activate Noise 2 – make sure Noise 2 is highlighted – or you will
just repaste Noise 1. Edit
– COPY MERGED.

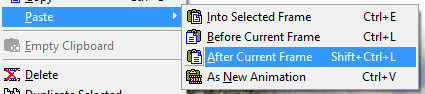
In A/S – Edit – PASTE AFTER CURRENT
FRAME
Back in PSP – X-out Noise 2 – open
and activate Noise 3 – Edit – COPY MERGED.
In A/S – Edit – PASTE AFTER CURRENT FRAME
Select the VIEW ANIMATION button
You will now see your image animated.
Go to FILE – SAVE AS – select the
folder you want to save it to – name it as you wish – and click OK.
IMPORTANT TIP: I
recently learned this – if you are planning on making tags for others – or just
want to have a tag without a name for the future , when
saving – choose to save it as a .MNG file. An .MNG
is the highest quality of animation – unfortunately most sites do not recognize
it and therefore we always have to use the .GIF format. Also, when
you duplicate an animation – always use the .MNG file, this way each tag will
start out with the best quality and not lose as much in the transition.